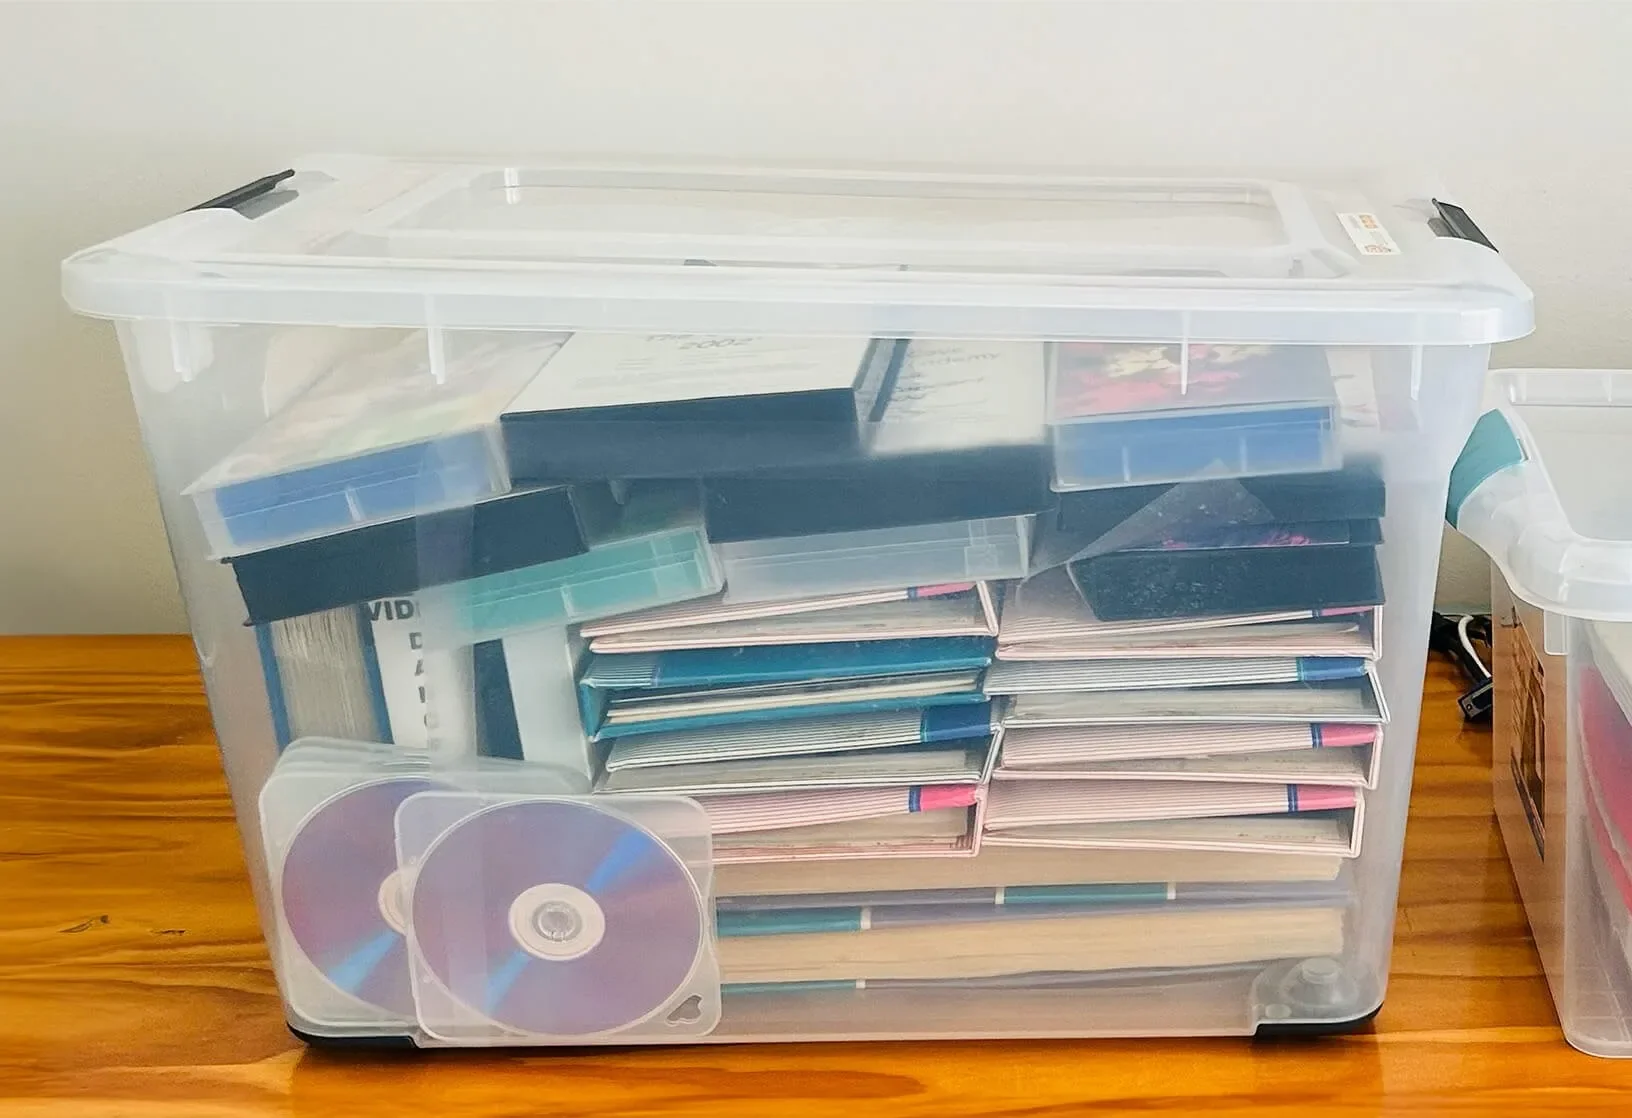
Photo Scanning and Media Conversion
Need your entire print collection organised? Learn about our family print organisation services.
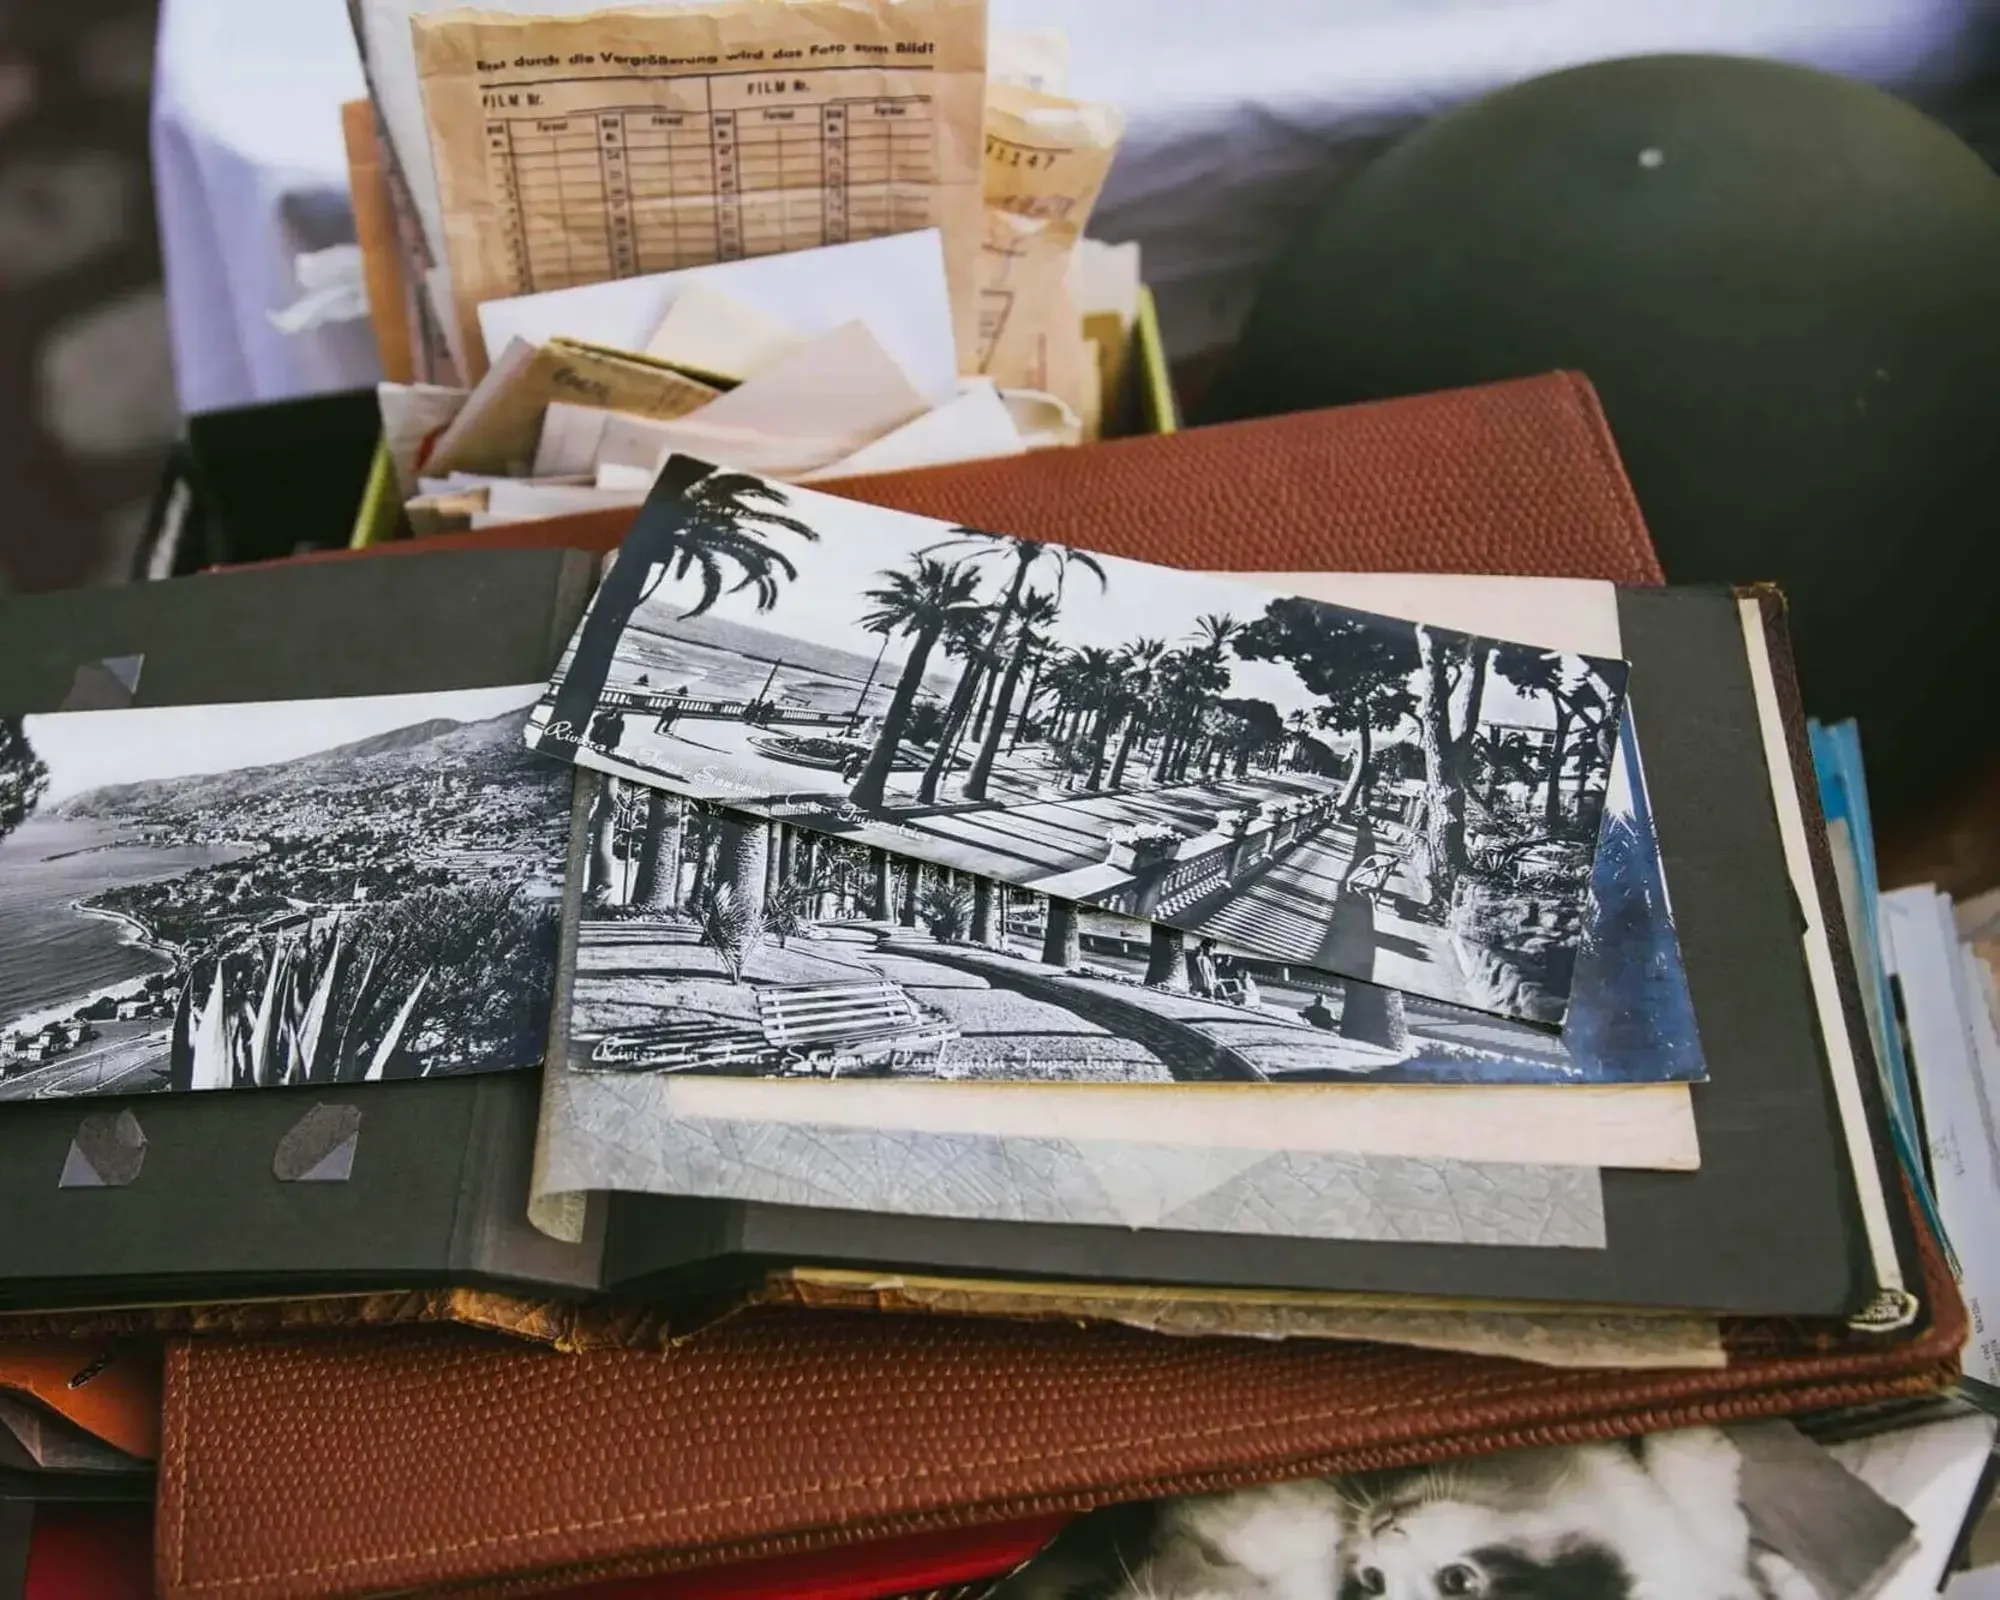
Photo Organising
Why Organise Your Family Photos?
Let's be honest: sorting through your family photos can seem like a massive job. But before you jump in, it's worthwhile to ask yourself: "What's my ultimate goal here?" A Photo Organiser Service can help guide you through the process. Understanding your motivation can help you stay focused and make the process more rewarding.
Common Reasons for Photo Organisation
Here are a few reasons why people undertake this journey:
1. Digital Access: Ability to view your cherished memories on your smartphone or tablet. Organising and digitising your photos makes this possible.
2. Decluttering: Organising can help you trim down your collection to the special shots.
3. Creating Keepsakes: Planning to make a photo book or slideshow? Organised photos make this process a breeze.
4. Preserving Memories: Are your old albums falling apart? Photos turning yellow? Organising and digitising can save these precious memories from the ravages of time.
Tackling Common Photo Challenges
Damaged Albums
If you've got albums that are falling apart or missing photos, here's what you can do:
- Carefully remove photos from damaged albums
- Scan the photos to create digital backups
- Store originals safely in archival-quality containers
Discoloured Photos
Notice your photos taking on a yellowish tint? This is often due to chemical reactions in old albums. The solution:
- Remove photos from problematic albums
- Scan them to preserve their current state
- Consider professional restoration for precious photos
- Separate any damaged pictures to see if you have a substitute or negative, and decide if you need to get this restored.
Damaged or Moldy Photos
Mouldy photos must be handled with great care, as they can pose health risks. It's important to wear gloves and a mask while working with them. Take the mouldy photos to a well-ventilated area and sort through them. It’s important not to let airborne spores into your living area. You may need to seek professional assistance to clean the photos before scanning them. After they are scanned, be sure to dispose of them safely.
Don't Ditch Those Negatives!
It might be tempting to toss old negatives, but hold onto them! They can be lifesavers if:
- The original photos are damaged
- You discover some printed photos are missing
- You want to make high-quality reprints in the future
Remember, organising your photos is about preserving your family's legacy. Whether you're doing it to share memories digitally, create new keepsakes, or protect your pictures from further damage, understanding your "why" can make the process more meaningful and manageable.
So, before you start sorting, take a moment to reflect on your goals. It'll help you stay motivated and make decisions as you go along.
Preserving Your Precious Family Photos
Are you worried about your family photos fading away in old albums? Here's how to keep those memories safe and vibrant.
Choose the Right Albums
When storing your photos, it's important to use the right kind of album. Here's why:
Old-style albums can harm your photos over time.
Chemicals in these albums react with the photos, causing discolouration.
That's why you might see yellowed or faded photos in older albums.
Pro Tip: Look for albums labelled as "photosafe". These are designed to keep your photos in great condition.
Storing Your Newly Digitised Photos
After we've helped you digitise your photos at PhotosSorted, you might wonder how to store the physical copies. Here's a great photo organiser solution:
Consider using a Photo Storage Box.
Look for one that's "acid-free" to prevent chemical damage.
A good box can hold up to 1,600 photos (6x4 size).
Some come with separate containers for easy organisation.
This way, you can keep your precious memories safe, organised, and easy to access. At PhotosSorted, we're here to help you every step of the way in preserving your family's photographic history.
Photo and Film Scanning
We can scan your negatives, slides, and memorabilia converting to digital images with Sydney's Photo Scanning. All media is handled with care using gloves, and we perform a light dust removal per item. All image files are cropped, correctly rotated, and auto-colour corrected.
Printed media that can be scanned at 600DPI
Loose prints
Photo albums - full pages or individual photos
Scrapbooks and memorabilia
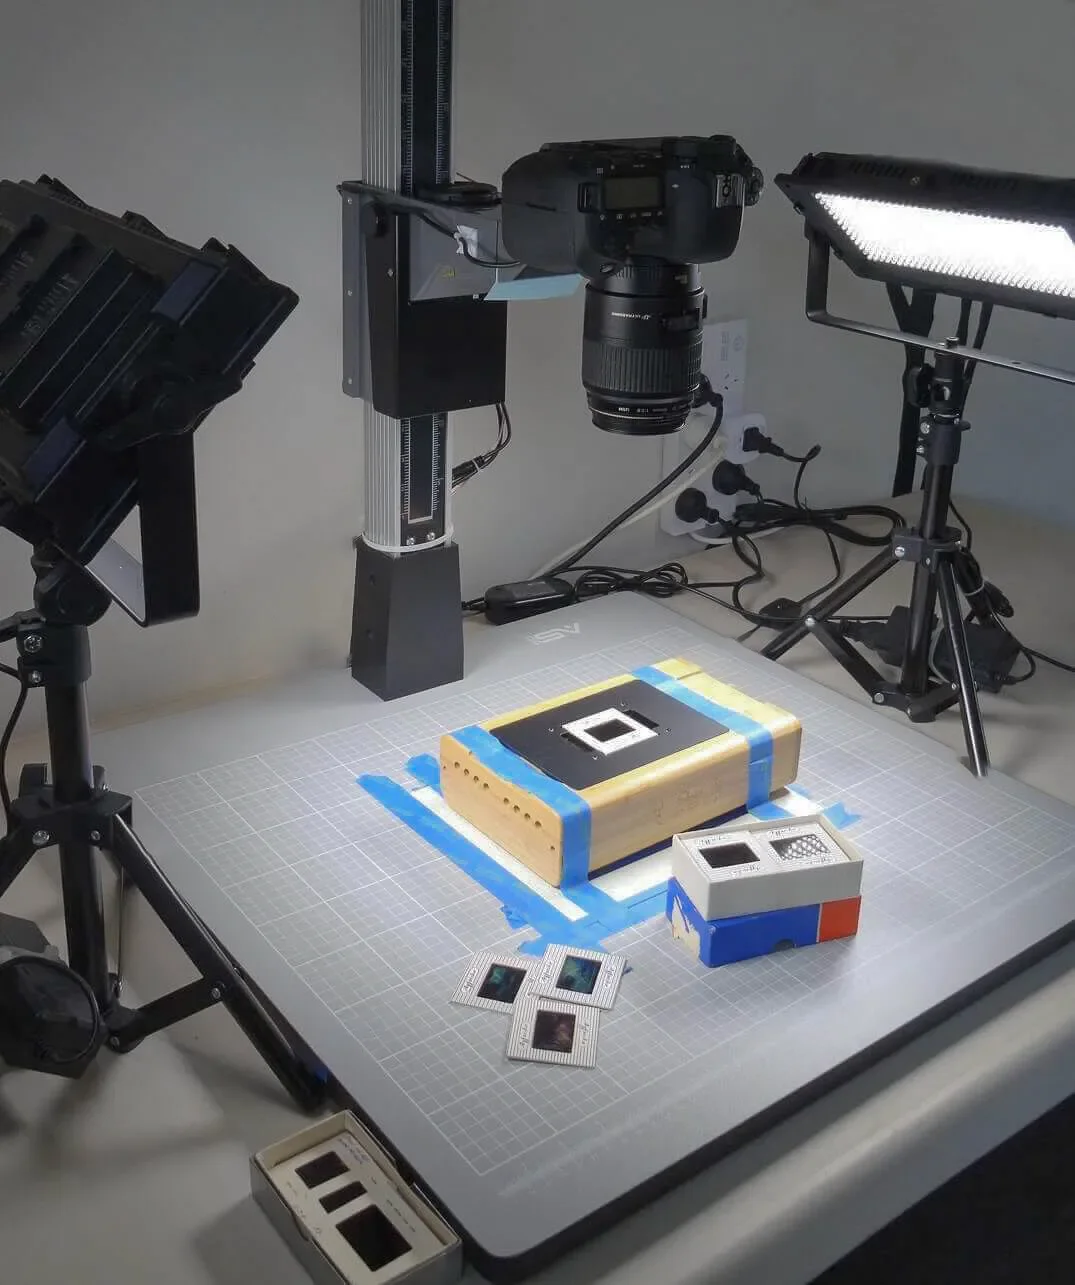
Film media types that can be Scanned at 4000DPI
35mm, 126, & 127 slides/film scanned to digital
120/220 medium format film scanned to digital
Other formats such as 110 film and large formats can be scanned by our trusted partners.
How to Digitise Old Photo Albums
Let's break down what's involved and why it might be worth calling in the experts.
The Challenges of DIY Album Digitisation
1. Size Matters:
Traditional albums can be big and heavy. Hard to manoeuvre on a scanner.
You might need a large scanner (A3 or bigger) to handle full pages.
2. Self-adhesive "magnetic" sheets:
The cover sheets can be wrinkled, damaged or dirty, making quality scanning hard to achieve
Removing photos from albums to provide full-size scanning can be difficult with some adhesives used in older albums.
3. Quality Concerns:
Scanning whole pages? Individual photos might end up with lower quality.
Removing photos for separate scanning can be tricky and sometimes risky.
4. Time-Consuming Process:
Scanning each photo individually takes a lot of time.
Cropping photos from full-page scans? That's even more time-consuming.Dealing with Stubborn Photos
Photos can be stuck in albums in various ways (slide-in mounts, sticky sheets, etc.).
Pro tip: Always scan the whole page first before attempting to remove photos.
Why Consider Professional Help?
Digitising photo albums is a meticulous task that requires time, patience, and sometimes specialized equipment. For busy mums juggling work and family, it might make sense to entrust this job to professionals like us at PhotosSorted. We have the expertise and tools to:
Handle delicate photos with care
Carefully remove and remount photos in an album
Saving additional information on the pages to add to photos
Ensure high-quality scans
Save you time and potential frustration
Remember, these are your precious family memories. Sometimes, it's worth investing in professional help to ensure they're preserved properly for future generations to enjoy.
Enhancing Your Photography Experience
Digitising slides or negatives unlocks higher-resolution images and enhances their overall condition. Negatives, in particular, provide a larger dynamic range than prints, resulting in images with richer colors and greater clarity.
Need help with slides? Check out our step-by-step guide for scanning and converting slides to digital in Sydney. We also offer assistance with converting negatives to digital.
Preserve Your Precious Memories
Old slides and negatives can degrade over time.
Digitising them now preserves their quality for years to come.
You might discover forgotten photos that aren't in your current collection!
Share and Enjoy Your Photos Easily
Once digitised, you can:
Create personalised photo books
Display images in digital photo frames
Share memories on social media
Enlarge and frame your favourite shots
Why DIY Scanning Might Not Be the Best Option
Thinking of scanning them yourself? Here's what you should know:
Quality Concerns:
Phone cameras and home printers often produce low-quality scans.
Issues like shadows, blur, and distortion are common.
Time-Consuming:
Scanning can be a slow, frustrating process.
Post-processing (cropping, rotating, enhancing) takes even more time.
Equipment Costs:
High-quality scanning equipment is expensive for a one-time project.
Let the Professionals Handle It
At PhotosSorted, we understand that as a busy mum, your time is precious. That's why we offer professional scanning services to:
Ensure high-quality digital copies of your slides and negatives
Save you time and frustration
Provide you with easily shareable digital memories
Don't let those precious memories fade away in storage. Let us help you bring them back to life!
I have questions…
-
It helps to be clear on your goals for your collection and know what you would like to achieve. We will offer a checklist to help you to gather your items.
Most people don’t know how many photos or images that they have and it can be surprising. You may wish to estimate the number as follows.
a pile of photos 25mm high is approximately 100 photos
a stack of slides 50mm high is approximately 40 slides
We suggest that you try to date your photos so we can set the capture date. This allows your photos to sort correctly when viewed in photo apps. Sort your photos into groups using print envelopes or cliploc bags.
A family timeline is also great start.
-
Yes, we currently scan photos, photo albums, slides, negatives, documents and children’s artworks onsite.
Negatives and videos come in many sizes and there are some which we may have to outsource to a partner.
We can also offer photobooks which we outsource to our local photo managers.
-
There are options on how this can be achieved
USB drive (dependent on number of images)
external hard drive (we can purchase one on your behalf)
cloud services (temporary download location setup by us or permanent location which is retained by you).
-
All media is returned to you.
We only retain images for the life of the project plus 12 months unless agreed otherwise. Retaining images post-project has been added as a backup option and has come to the rescue for some of our clients!
-
We understand that not all photos need to be scanned.
A common method is to mark photos to scan with coloured adhesive dots (available from office suppliers). Choose durable dots that won’t peel off during handling.
Media Conversion
Convert old media formats that can no longer be accessed. Many people have items that cannot be viewed because they no longer have the equipment to play them. Converting old formats will let you relive old memories.
We can convert :
VHS/VHS-C video tapes into MP4 digital
DVD video into MP4 digital
Photo CDs into JPG digital
CD video into MP4 digital
CD audio into MP3 digital
Videos are edited to remove unwanted footage at the lead-in or the trailing end. Additional video editing is an option. Our trusted partners can also digitise other formats.
Ask us how we can convert your old media.
Why You Should Convert Your VHS Tapes and DVDs
Do you have boxes of old VHS tapes and DVDs tucked away?
VHS Tapes: A Ticking Time Bomb for Your Memories
Did you know?
VHS tapes were never meant to last forever.
After 25 years, these tapes can lose 10-20% of their quality.
Poor storage (heat, humidity, dust) can make them deteriorate even faster.
What this means for you:
Your precious home videos might be at risk.
The quality of your recordings could be getting worse without you realizing it.
DVDs: Better, But Not Perfect
Good news:
DVDs and CDs can last 50-100 years if stored properly.
But watch out:
Scratches from frequent use can ruin playback quality.
Flimsy storage sleeves don't offer enough protection.
Why Go Digital?
Preserve Your Memories: Stop the quality loss in its tracks.
Easy Access: Watch your videos on TVs, laptops, or phones.
Future-Proof: Don't worry about finding a working VHS player!
Let PhotosSorted Help
Don't let those precious family memories fade away. At PhotosSorted, we can:
Convert your VHS tapes and DVDs to digital formats.
Ensure high-quality conversions.
Save you time and hassle.
Ready to preserve your family's video history? Let's chat about how we can help!